To change a material in SOLIDWORKS, right-click Material in the part's FeatureManager design tree, choose Edit Material, select a library material, then click Apply and Close. For one body or an assembly component, start from that body or component instead. Assign the physical material before choosing its finish: the material supplies properties such as density, while an appearance controls how the model looks.
I'd make the material assignment before preparing a drawing or checking weight, because those outputs need a property stored in the model. A brass-coloured surface alone cannot tell the BOM what stock to buy.
Assign a material to the whole part
- Open the part and find Material in the FeatureManager design tree.
- Right-click it and select Edit Material.
- Expand the appropriate library and category, then select the required grade. Read the material name and its properties; a similar colour or family name does not establish an equivalent specification.
- If the file has several configurations, set the configuration scope before applying the choice.
- Click Apply, then Close. Save the part.
You can also pick a material directly from the right-click favourites list. Both routes assign a material; opening the editor gives you room to inspect the grade before accepting it. Use Apply to commit the selected material before closing the dialog.
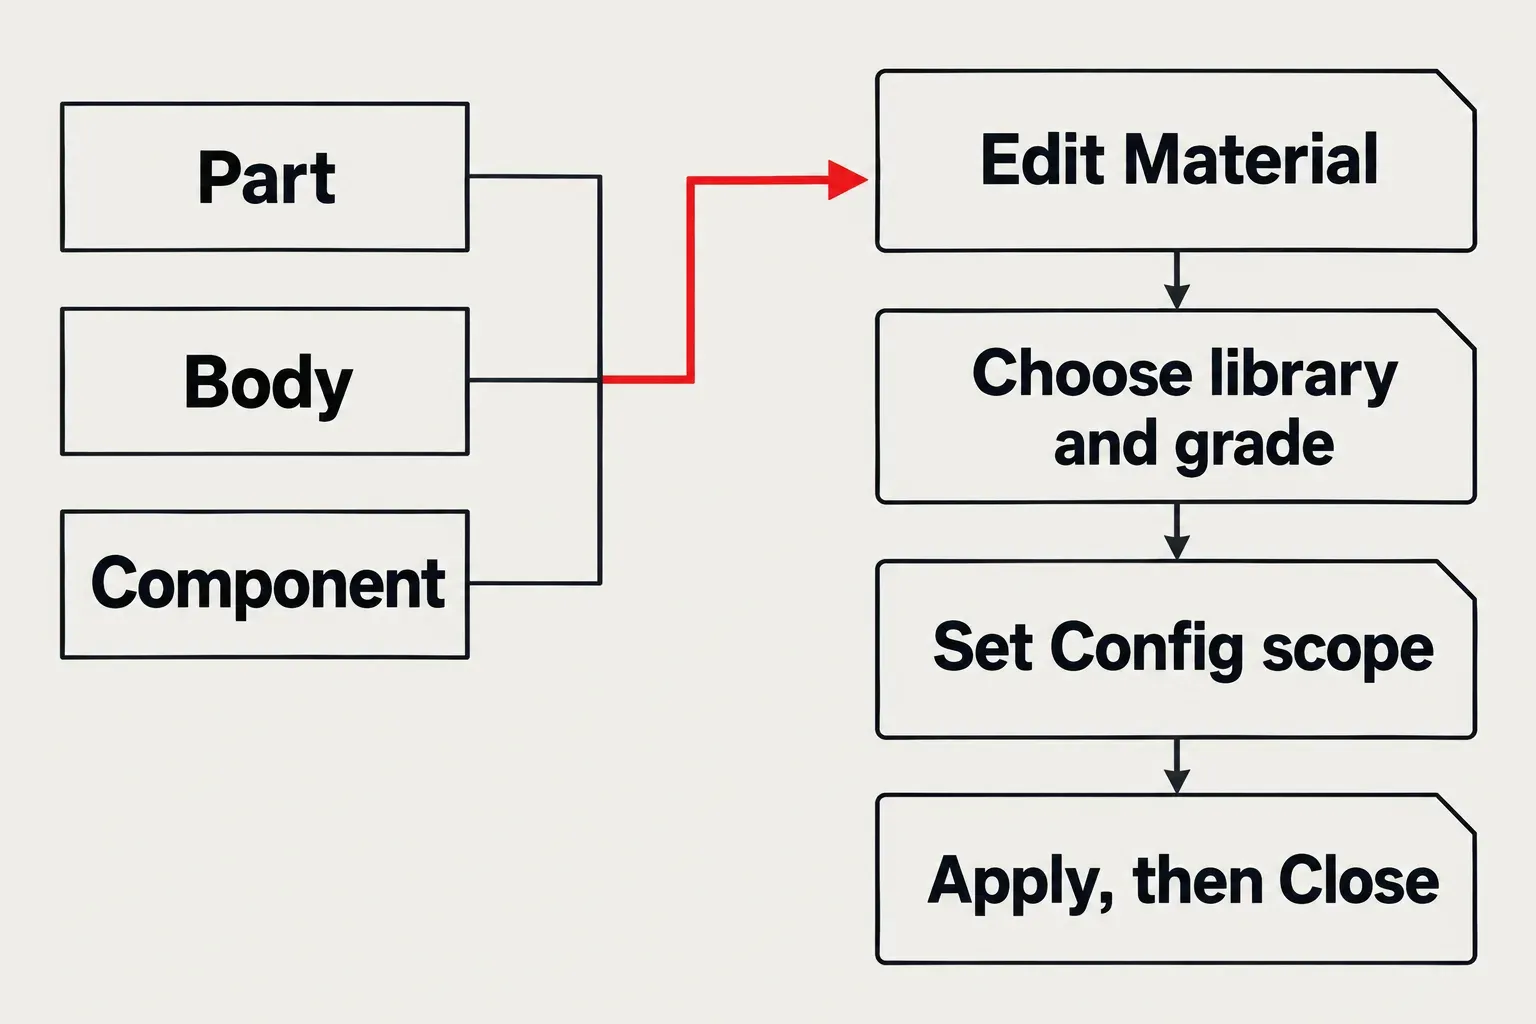
Choose the body, component and configuration deliberately
A feature is not a separate material region just because it has its own name in the tree. If an extrude and a revolve merge into one solid body, selecting the feature does not turn that region into another material. Use the body structure that represents the physical pieces.
| What needs the material? | Where to start | What to check afterwards |
|---|---|---|
| The whole part | Right-click Material in the part tree. | The assigned grade and the configuration scope. |
| One or several solid bodies | Expand Solid Bodies, select the bodies, right-click one and choose Material. | Each selected body, including any existing body assignment. |
| Components in an assembly | Select the components, right-click and choose Material. | The referenced component files and configurations, not just the assembly's appearance. |
SOLIDWORKS supports material assignment to selected bodies and assembly components. Check the component's material afterwards if a change appears in the wrong place; an assembly contains references to parts, and the same file can occur more than once.
Use the configuration scope for material variants
In a part with multiple configurations, the Material dialog's Config control lets you apply the material to the current configuration, all configurations or specified configurations. Set that scope explicitly: otherwise the material is applied to all configurations, which would erase a deliberate aluminium-versus-steel distinction.
For several variants at once, right-click Material and select Configure Material. In the Modify Configurations table, choose a material for each configuration; use Browse More if the entry is not in the available list. This is a configuration-level material edit, separate from changing the active model's colour. Use configurations for material variants when the variants belong in one part file.
Keep material and appearance separate
A material can bring an appearance with it. In the Material dialog's Appearance tab, Apply appearance of controls whether that appearance is applied with the material. Clear it when you want to assign the material without applying its appearance.
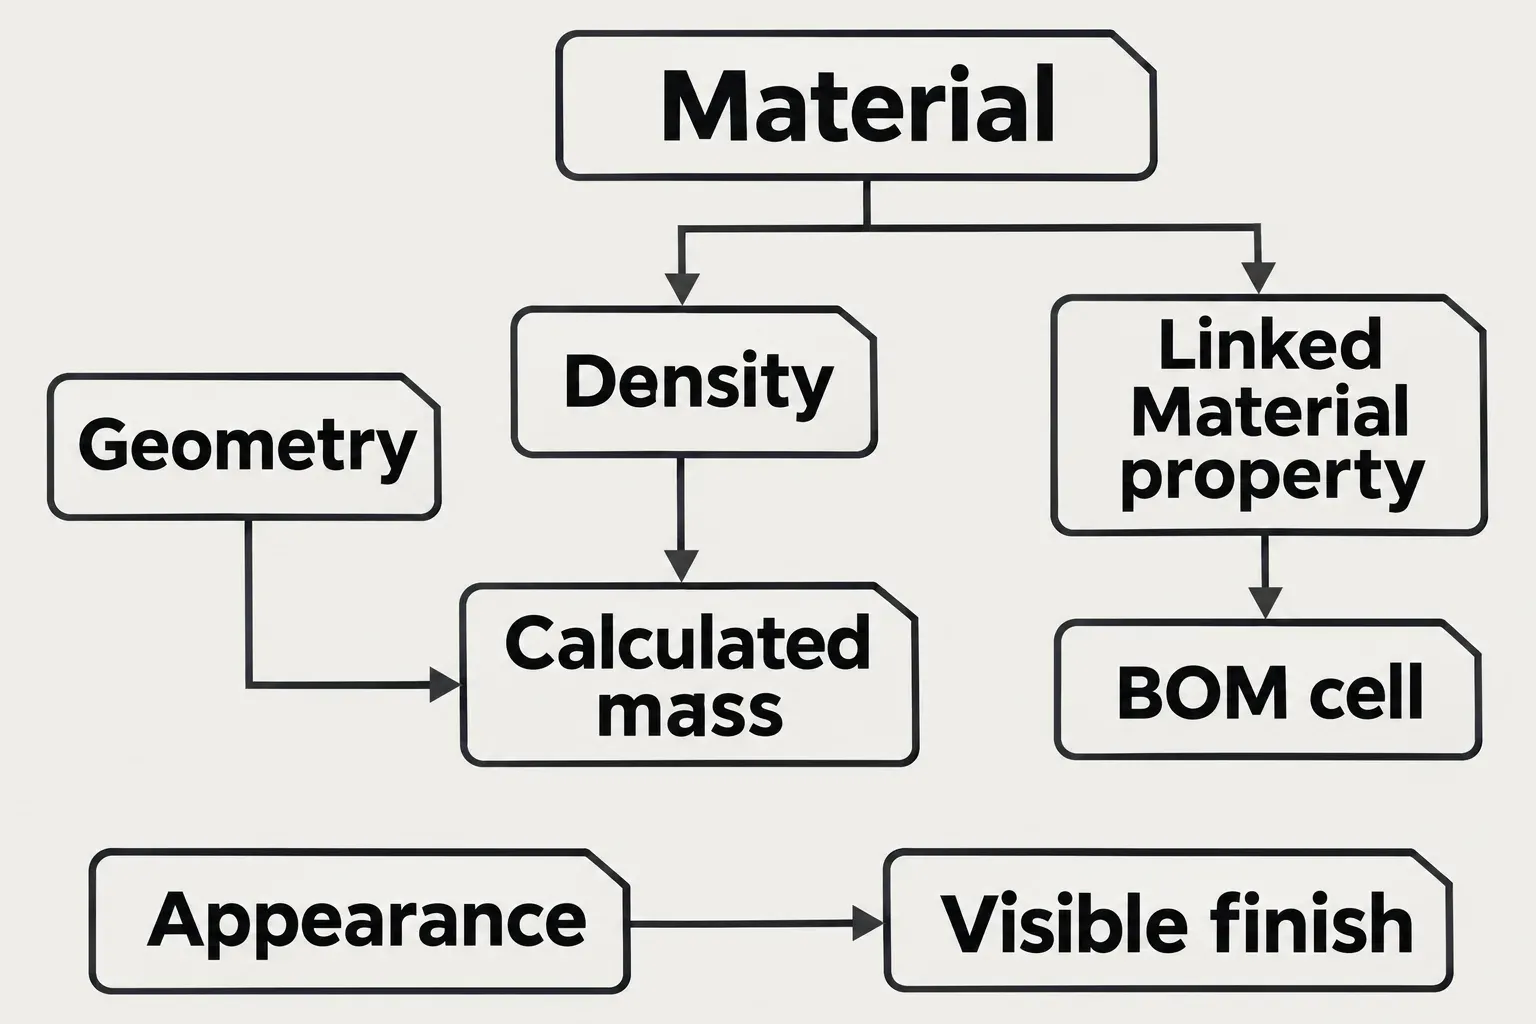
The reverse matters too: applying a metallic appearance does not supply the physical properties of that metal. A rendering can look like brass while the part still has no material assignment. Inspect the Material item and Mass Properties rather than judging the assignment by colour.
If the material is correct but the surface still looks wrong, check for a more specific appearance. SOLIDWORKS has an appearance hierarchy across components, faces, features, bodies and parts; an appearance higher in that hierarchy can hide the one you expect to see. Remove or edit the appearance at the responsible level instead of repeatedly reassigning the physical material. If each configuration needs its material appearance, link its display states to configurations in Display State Properties > Advanced Options.
Add a custom material when the library lacks the grade
Use the material supplier's datasheet for the actual grade, product form and condition. An entry with a familiar alloy name is not enough if its density or heat treatment does not match the stock. Its mechanical properties need to match too. For a study, keep the datasheet and its units with the model's engineering records.
- Open Edit Material from the part's Material item.
- Copy a suitable existing entry, then paste it into a category in a custom library. Create a category first if necessary; you cannot paste directly into the top-level Custom Materials folder.
- Rename the copy so its grade and condition are identifiable.
- On the Properties tab, choose the units and enter the supported property values. Check each value against the supplier's document.
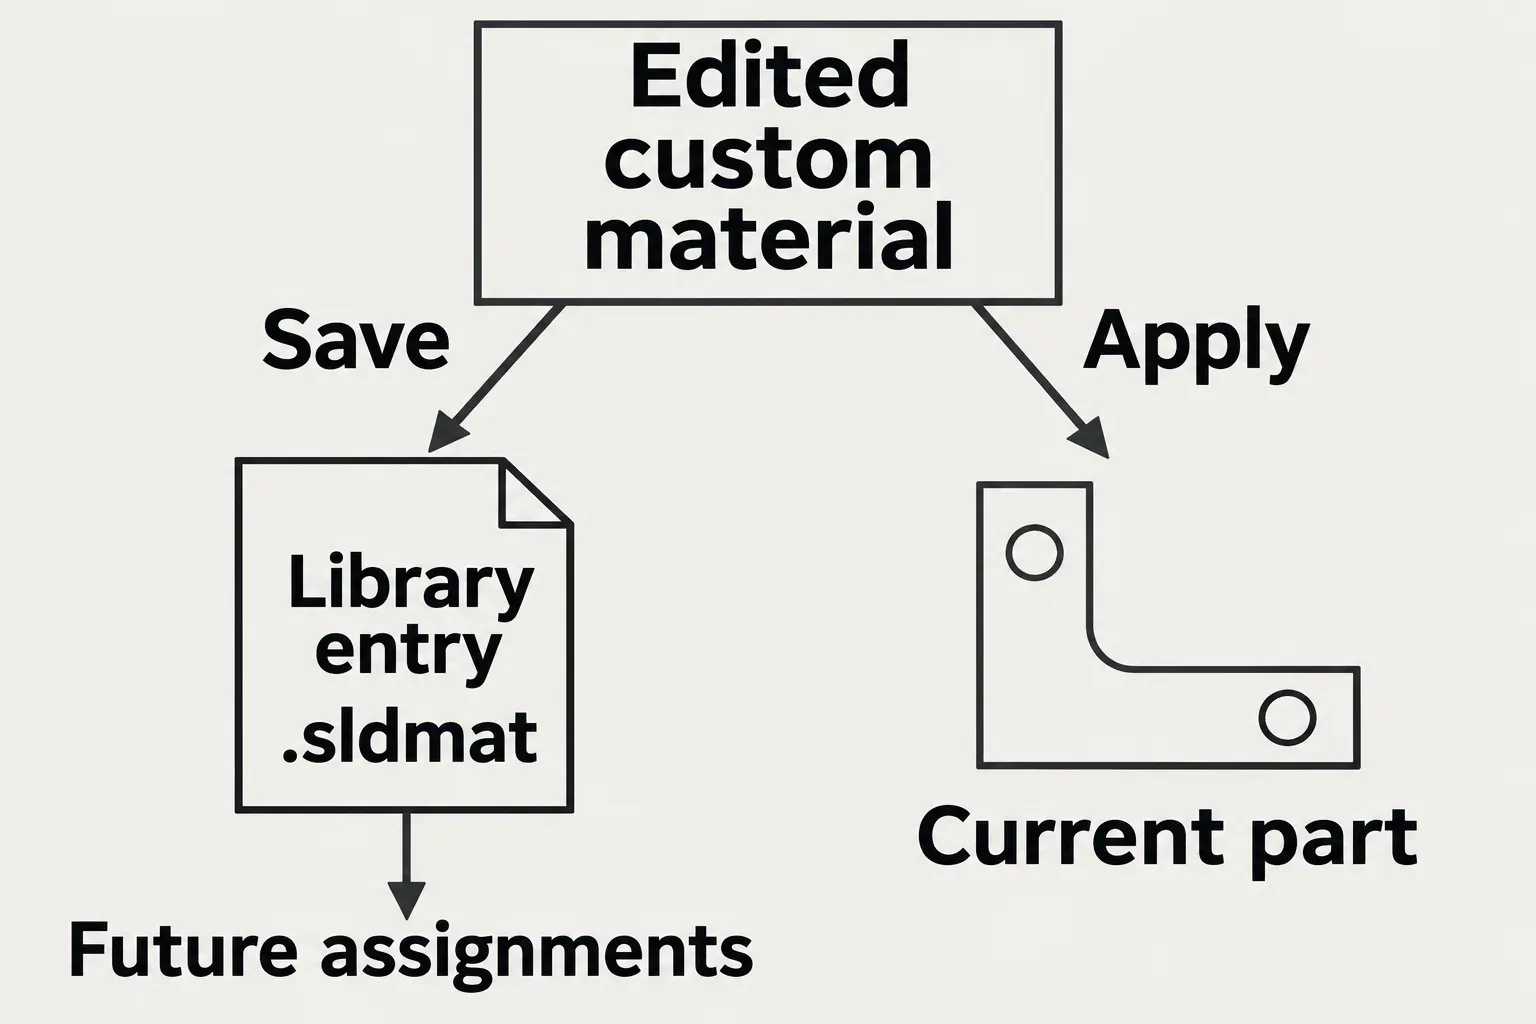
- Click Save to save the custom material, then Apply if you want to assign it to the current part. Close the dialog and save the part.
The standard SOLIDWORKS Materials library is read-only; copying an entry into a custom library gives you an editable material. Save and Apply do different jobs: Save retains the library changes, while Apply assigns the material to the part. If a needed property was absent from the copied entry, select All model types for the custom material to expose the additional properties, edit them and save. Reopen a previously assigned part and check its values after revising a library entry; do not assume every old assignment has adopted the revision.
To keep a separate company library, right-click an item in the material tree and choose New Library. Pick its location and filename; the custom material database uses an .sldmat file. Give colleagues access to that library as well as the part files when they need to select and maintain the same entries.
Check what the assignment changes downstream
Mass: check density, selection and overrides
Open Tools > Evaluate > Mass Properties. Clear a body or component selection if you want the whole model's result. The report calculates mass from the model geometry and material properties; for one homogeneous body, mass is density multiplied by volume.
If the weight does not follow a density change, check the active configuration and body-level material assignments, then inspect Override Mass Properties. An assigned mass override can keep the reported mass fixed. Also check Options > Use custom settings: its custom density affects this report, without overriding other document mass-property functions. A reporting option is not a substitute for assigning the intended material.
BOM: link the material property
A BOM cell typed as “Steel” is just text. In File > Properties, create a Material custom property and choose SW-material in its Value / Text Expression list. Use that property for the BOM column. The official drawing workflow links a Material custom property to the part's material before displaying it in a BOM. Check the configuration referenced by the drawing or assembly when the displayed grade differs from the one you see in the open part.
Keep the material as model data throughout the hand-off.
Simulation: inspect the study's material too
SOLIDWORKS Simulation uses the CAD material by default, but a study can have its own assignment. Assigning a material in the study does not update the CAD model's material. Check the material for each study part or body and the properties required by the selected analysis; a correct density alone does not establish an appropriate structural material model.
After changing a material, update and rerun the affected analysis before using its results. The stress-study workflow also needs suitable restraints, loads, contacts and mesh checks. A material label or coloured result plot does not establish that the physical part is safe.
Make one change and follow it through
In a copy or a deliberate material-variant configuration, record the assigned material, volume and mass. Apply a second material with a different documented density, rebuild, and reopen Mass Properties. For a single uniform body whose geometry is unchanged, the volume should stay the same and the mass should change in proportion to density, unless an override controls the result.
Then check the material property in the drawing or BOM, and inspect the study assignment before rerunning an analysis. For sheet metal using a custom material, first check whether material-linked sheet-metal parameters are enabled: a material change can also affect those parameters, so unchanged geometry cannot be assumed there. The useful result is a model whose material, weight and downstream callouts describe the same intended part.